Motivation
Kommerzielle Wallbox-Systeme sind häufig geschlossene Systeme, bei denen Funktionen wie PV-optimiertes Laden nur eingeschränkt oder über Cloud-Dienste verfügbar sind.
Ziel des Projekts war eine eigene Lösung mit vollständiger Kontrolle über Funktion und lokale Integration in Home Assistant, ohne externe Abhängigkeiten.
Systemaufbau
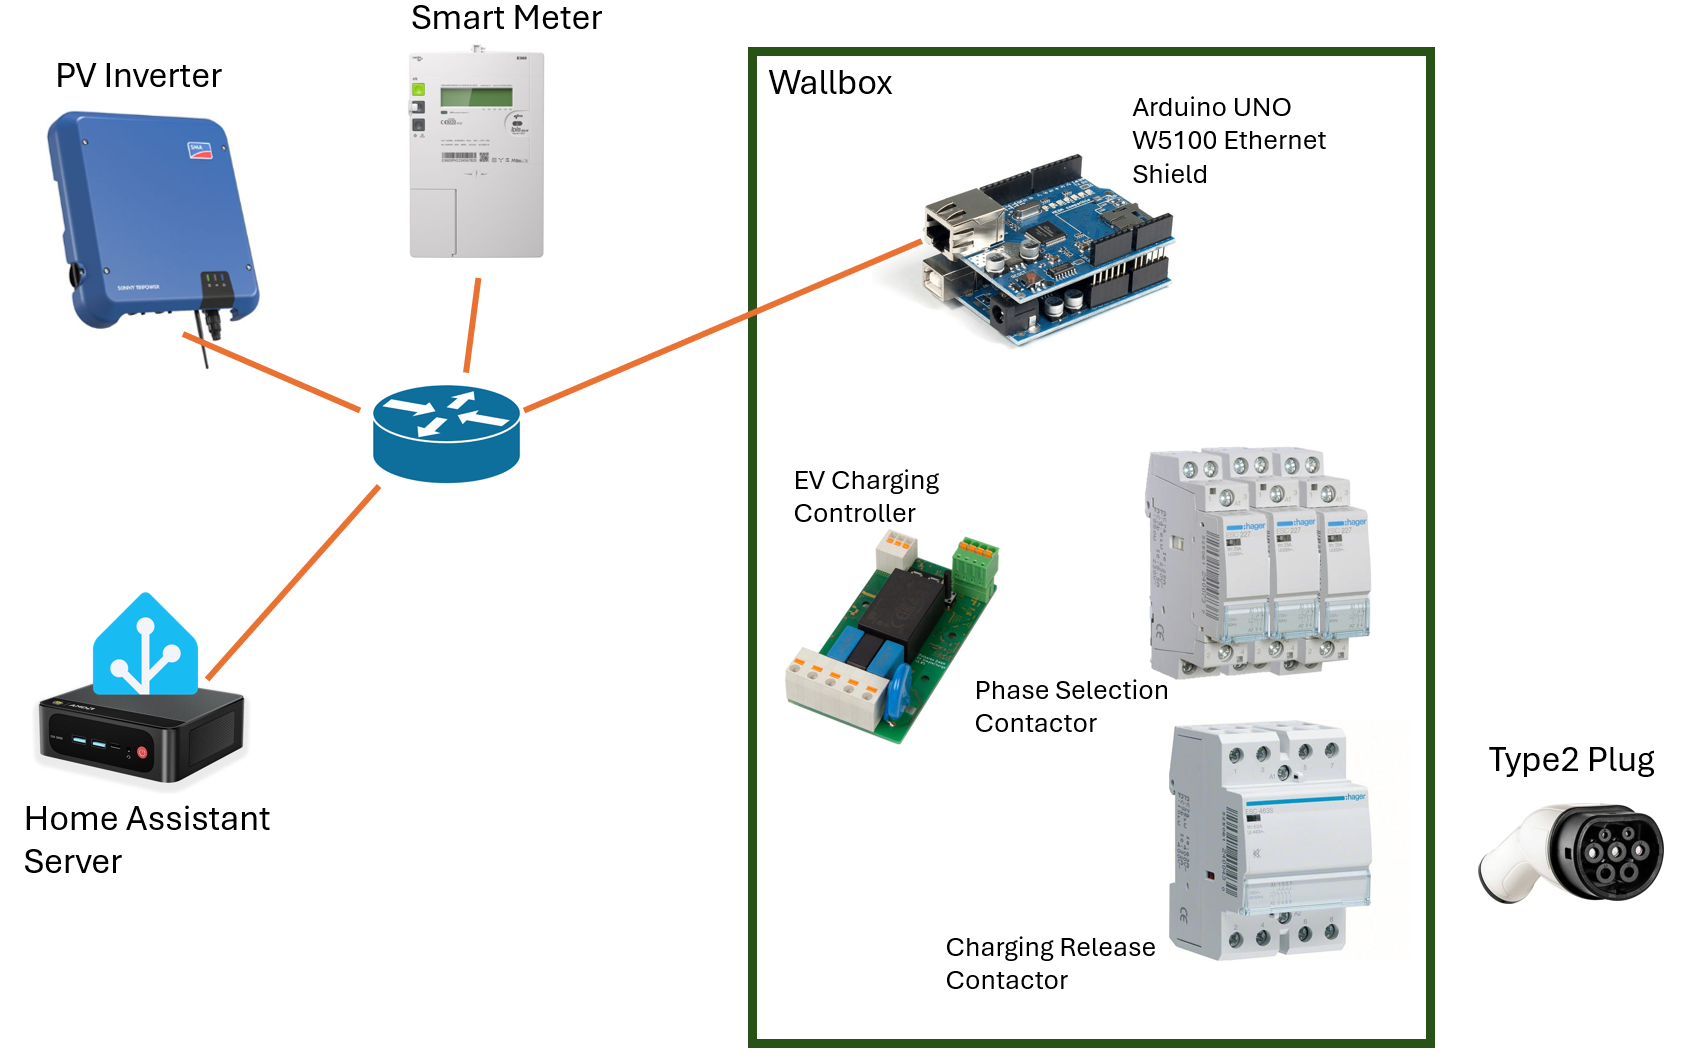
Die Wallbox ist vollständig in die bestehende Energieinfrastruktur eingebunden. Energiezähler, Photovoltaik-Wechselrichter und Verbrauchsdaten werden zentral in Home Assistant zusammengeführt.
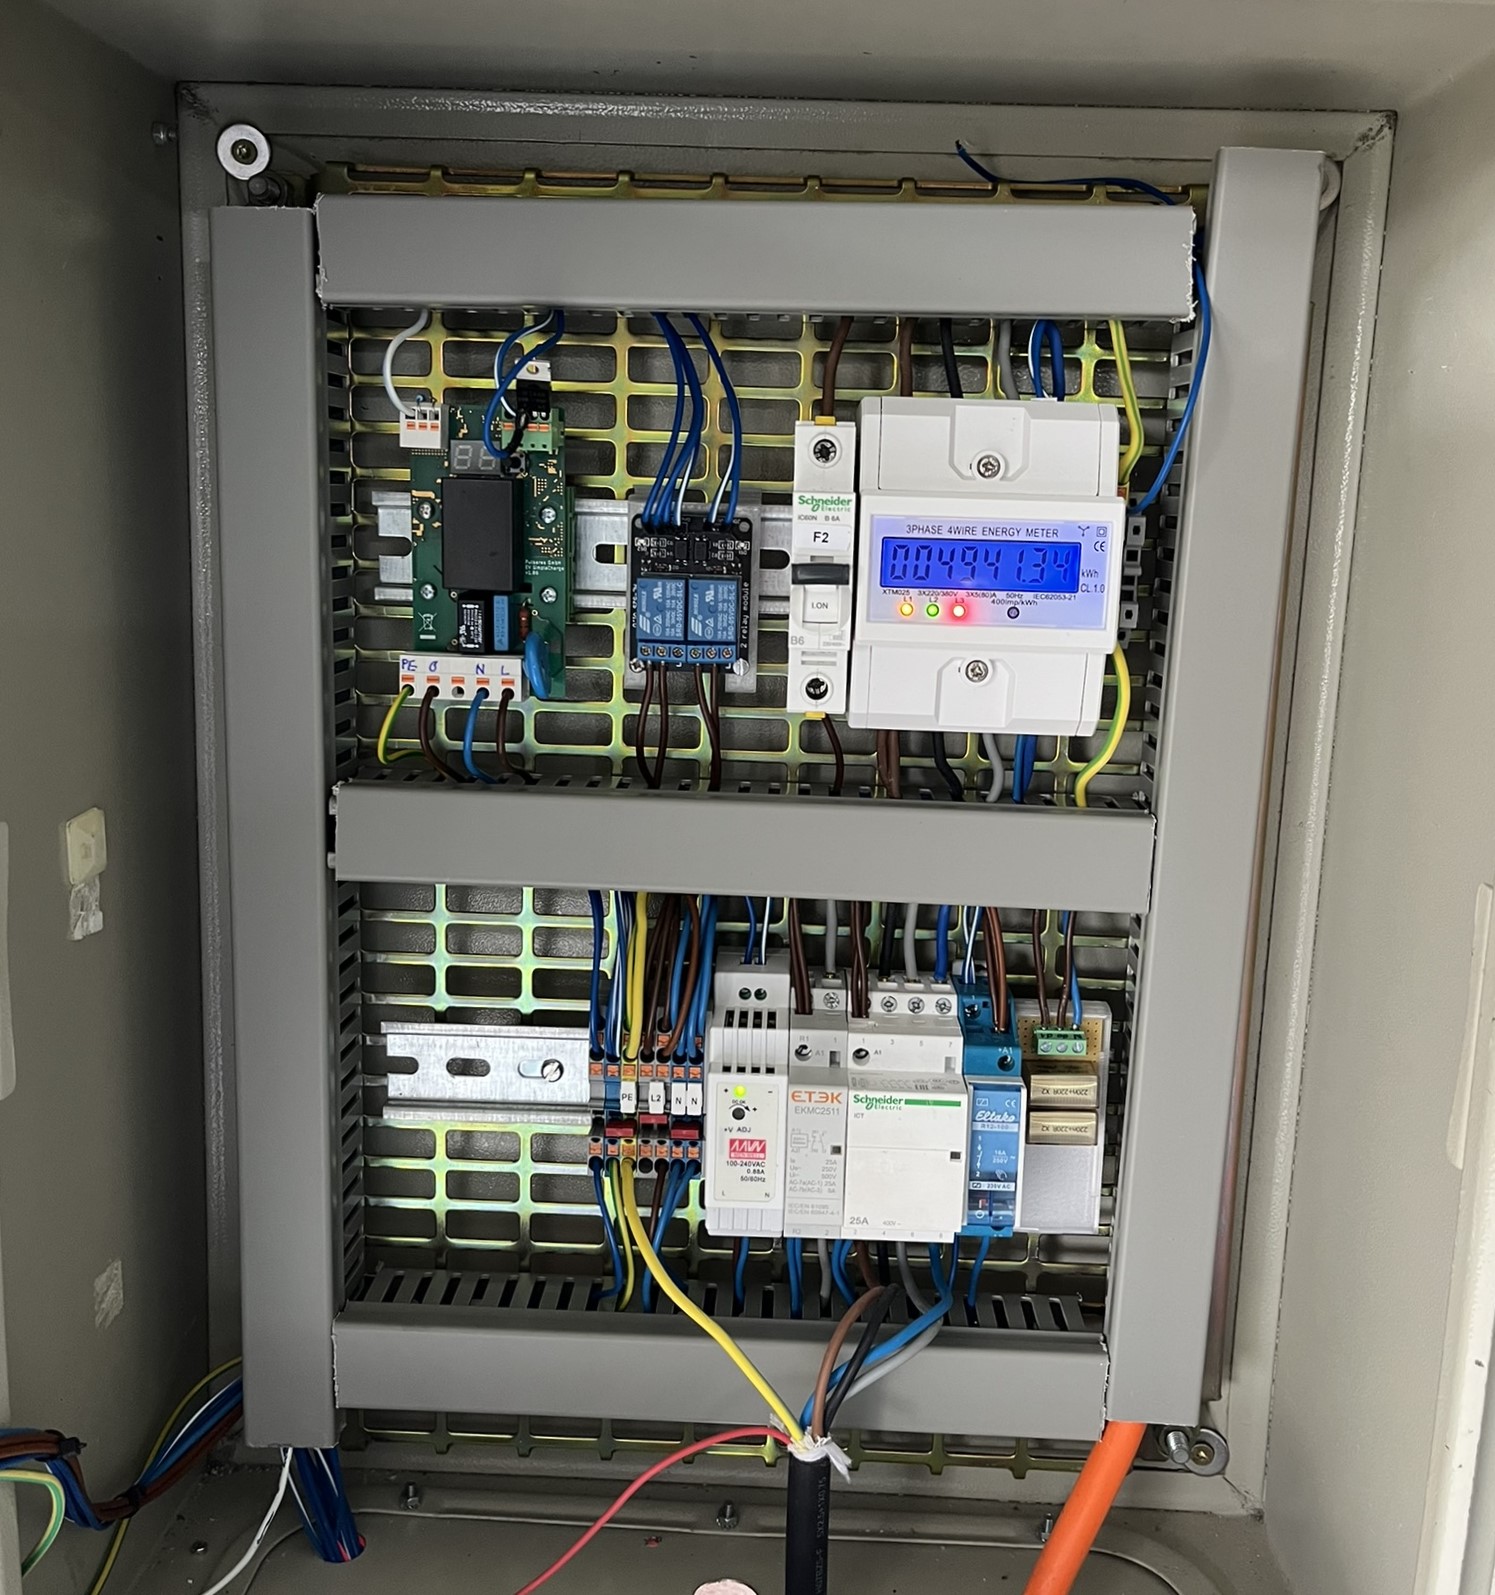
Kernkomponenten der Hardware:
- Arduino UNO mit W5100 Ethernet-Shield für Steuerung und Kommunikation
- Pulsares EV SimpleCharge Controller für die Fahrzeugkommunikation
- Leistungsschütze zur Umschaltung der Phasenkonfiguration
- Hauptschütz zur sicheren Freigabe des Ladevorgangs
- Relaismodule für Hilfs- und Steuerkreise
- Energiezähler zur Echtzeitmessung des Stromverbrauchs
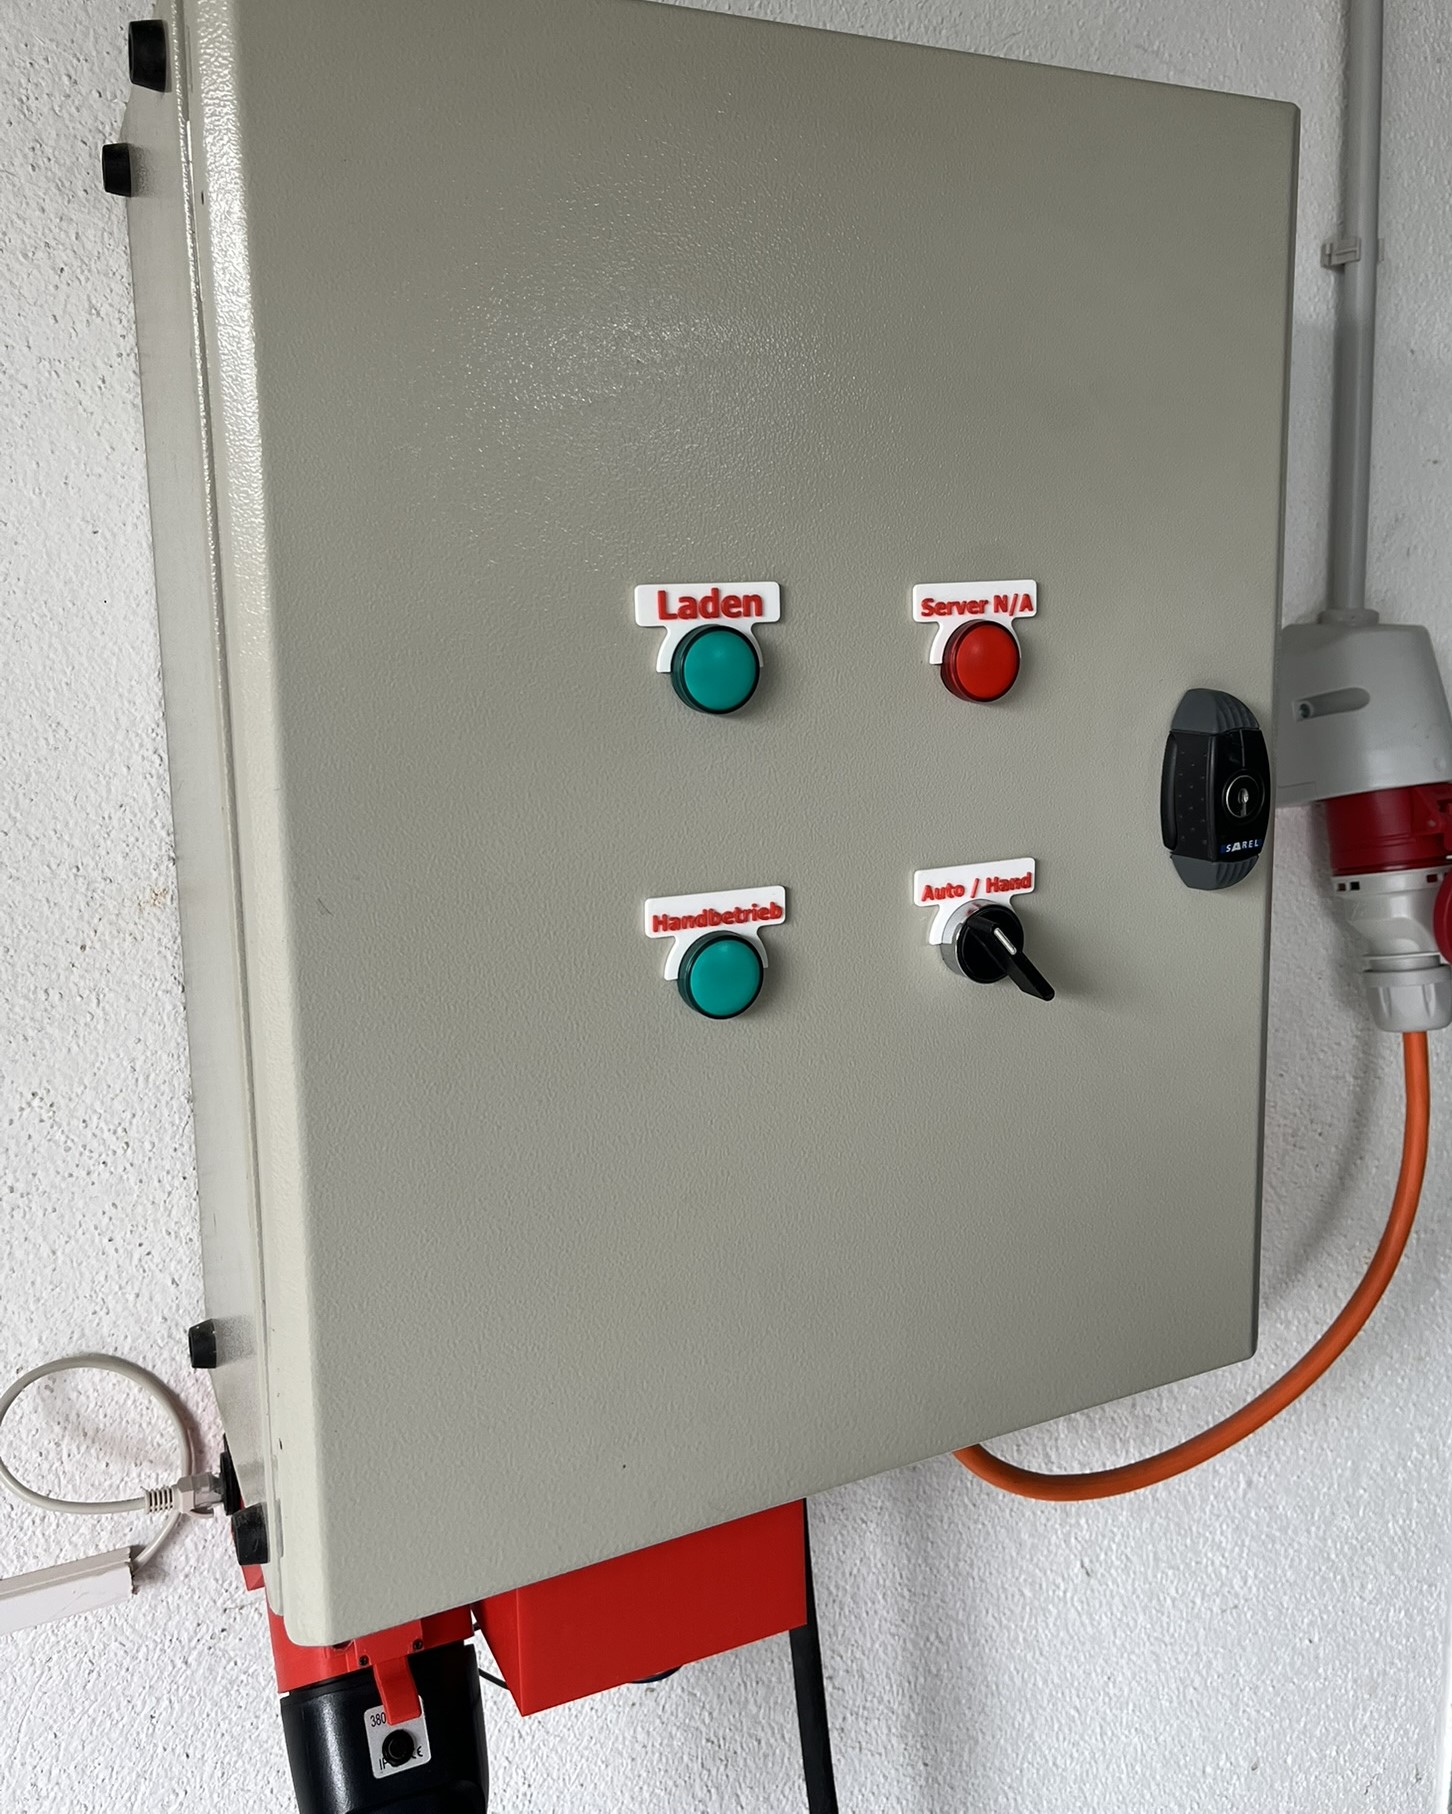
- Bedienfeld mit Schalter und Statusanzeigen
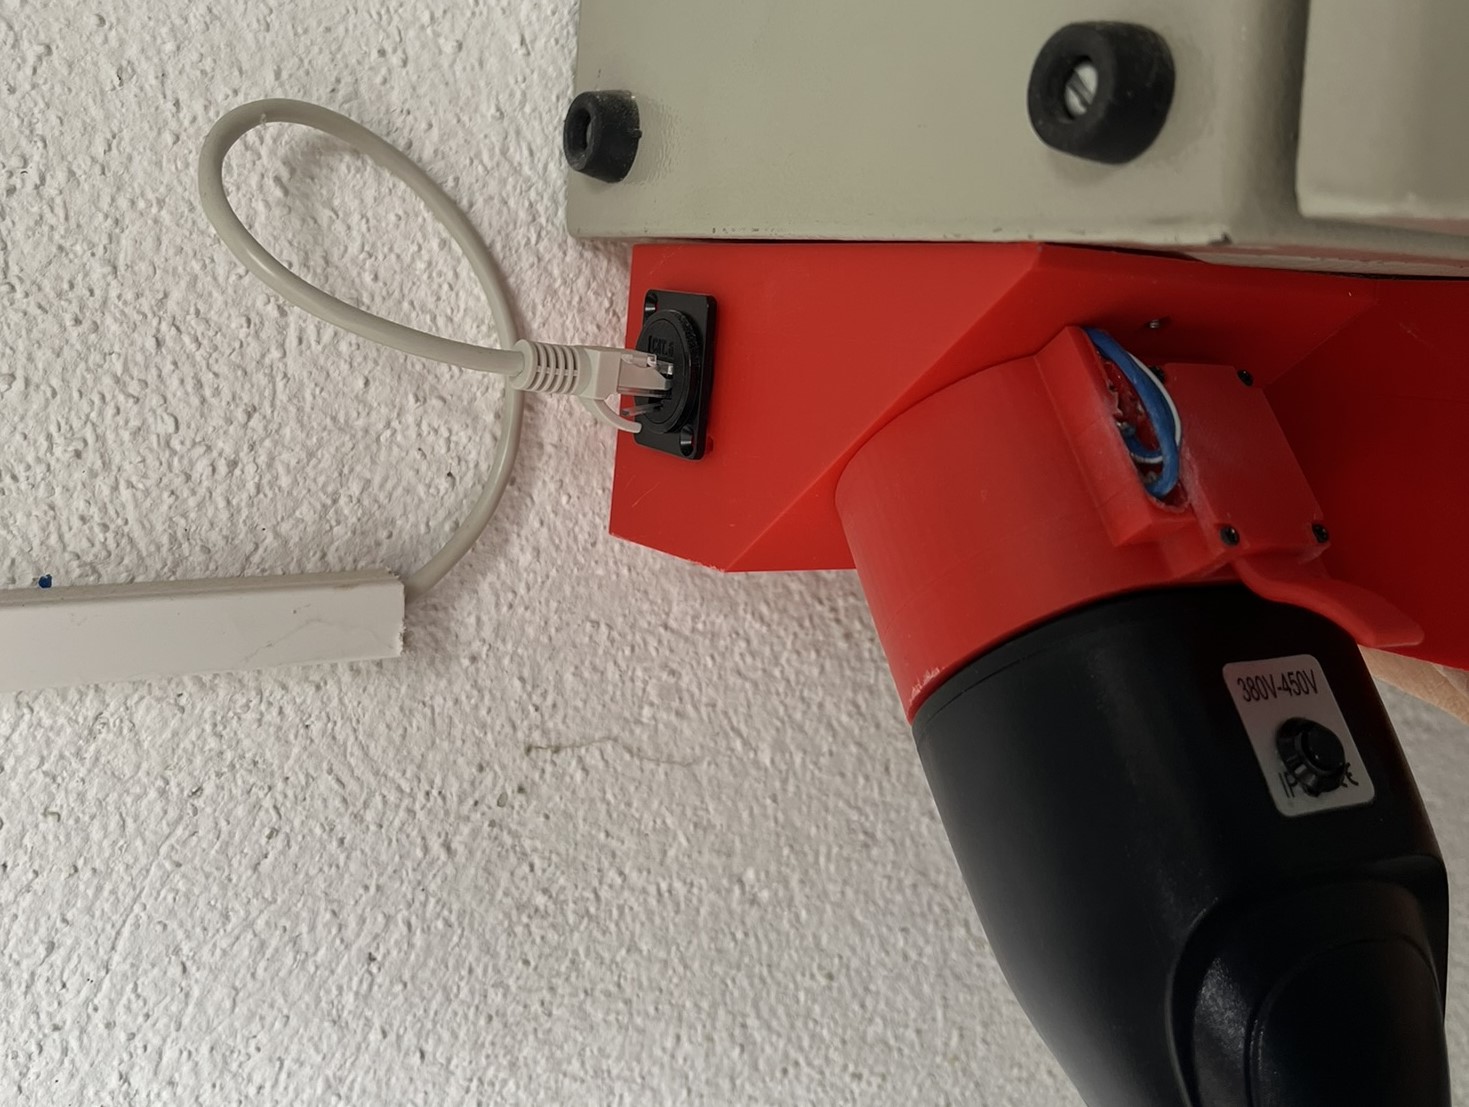
- Steckerhalter mit Schalter zur Erkennung des eingesteckten Ladekabels und vollständiger Abschaltung im Ruhezustand
Steuerung & Lademanagement
Die Wallbox selbst führt keine eigene Optimierungslogik aus. Sie setzt lediglich die von Home Assistant vorgegebene Ladestufe um. Entscheidungen über Ladeleistung, Netzbezug und PV-Überschuss erfolgen vollständig zentral in Home Assistant.
Die Steuerung erfolgt über MQTT. Eine empfangene Zahl definiert den Betriebszustand. Wert 0 deaktiviert den Ladevorgang. Weitere Stufen entsprechen festen Strom- und Phasenkonfigurationen. Einphasiges Laden wurde bewusst nicht umgesetzt, da es im praktischen Betrieb keinen relevanten Vorteil brachte.
Implementierte Ladekonfigurationen:
- Zweiphasiger Betrieb mit Stromstärken zwischen 6A und 13A (2.8kW - 6kW)
- Dreiphasiger Betrieb mit Stromstärken zwischen 6A und 13A (4kW - 9kW)
Die empfangene Ladestufe wird vom Arduino in ein PWM-Signal umgesetzt und an den SimpleCharge Controller weitergegeben. Die Schaltung der Leistungsschütze erfolgt deterministisch auf Basis dieser Vorgabe ohne zusätzliche lokale Logik.
Zusätzlich werden Betriebszustände wie aktiver Ladevorgang, Steckerstatus und Ladeleistung an Home Assistant zurückgemeldet, um Monitoring und Logging zu ermöglichen.
Bei einem Ausfall der Netzwerkverbindung wird der Fehlerzustand lokal über eine Status-LED angezeigt. Ein manueller Betriebsmodus erlaubt das Laden mit festen Parametern unabhängig vom Netzwerk.
Sicherheitsfunktionen wie maximale Strombegrenzung und Verriegelung werden direkt vom Laderegler überwacht und sind unabhängig von der externen Steuerung.